
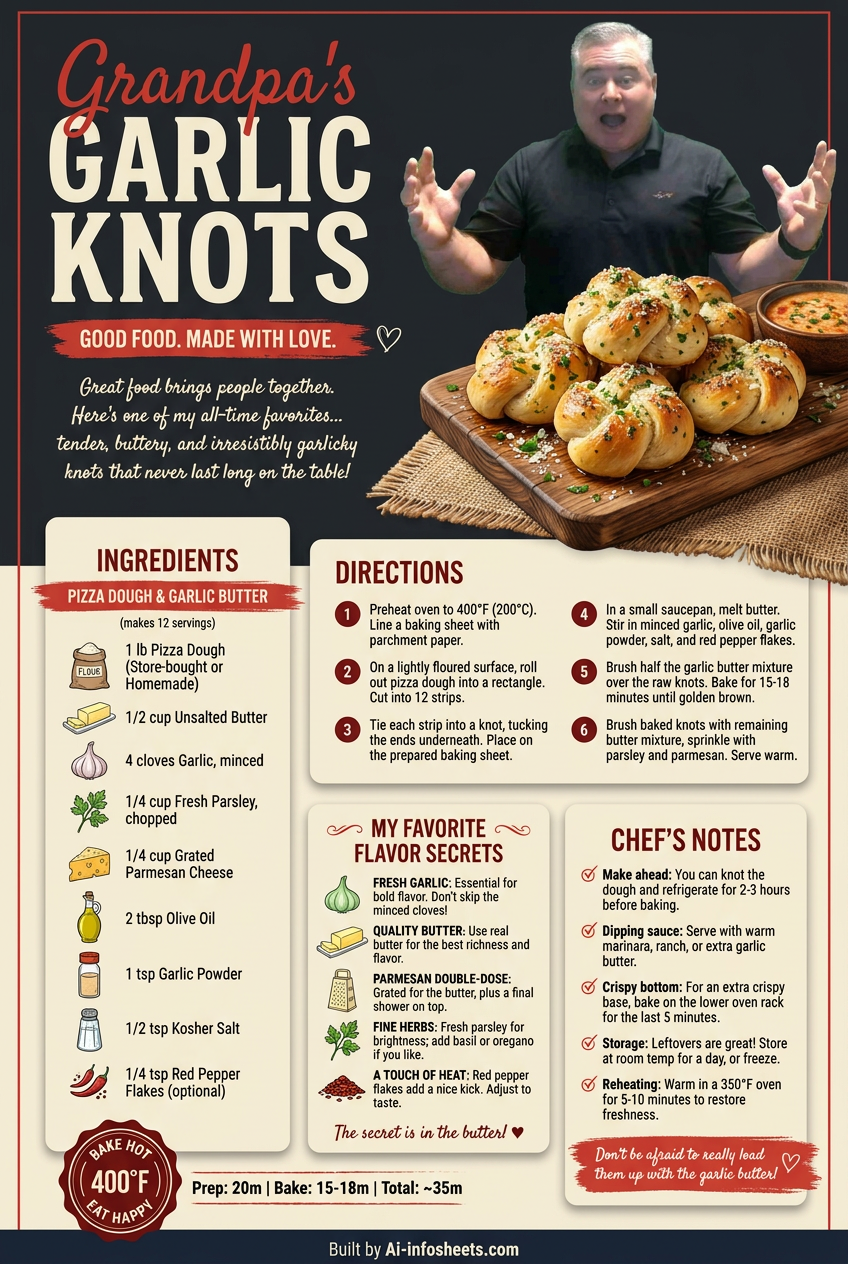
Garlic knots, those delightfully twisted, savory bites of dough drenched in garlic butter, are a staple in Italian-American cuisine and a beloved accompaniment to countless meals. While often associated with pizzerias, crafting them at home is a surprisingly simple and rewarding endeavor. This guide will walk you through the process, ensuring you achieve fluffy, flavorful knots every time, from preparing the yeast to perfecting that irresistible garlic-infused finish.
Understanding the Basics: Yeast and Dough
Homemade garlic knots begin with a good dough. The foundation is typically a lean dough, similar to pizza dough, made with flour, water, salt, sugar, and yeast. Active dry yeast or instant yeast can be used, with instant yeast often preferred for its convenience as it doesn't require proofing beforehand. The sugar acts as food for the yeast, helping it activate and produce carbon dioxide, which creates the airy texture of the dough, while salt regulates yeast activity and enhances flavor.
Activating the Yeast
If using active dry yeast, it's crucial to "proof" it first. Combine 1 packet (7 grams) of active dry yeast with 1 teaspoon of sugar and 1 cup of warm water (around 105-115°F or 40-46°C). Let it sit for 5-10 minutes until foamy. This confirms the yeast is alive and active. Instant yeast can generally be mixed directly with the dry ingredients.
Kneading the Dough
Once your yeast is ready, combine it with 3 cups of all-purpose flour, 1 teaspoon of salt, and 2 tablespoons of olive oil. Knead the dough for 8-10 minutes by hand or using a stand mixer with a dough hook until it becomes smooth and elastic. The kneading process develops the gluten, which gives the knots their structure and chewiness.
First Rise
Form the kneaded dough into a ball and place it in a lightly oiled bowl, turning once to coat. Cover the bowl with plastic wrap or a clean kitchen towel and let it rise in a warm, draft-free place for 1 to 1.5 hours, or until it has doubled in size. This initial rise allows the yeast to work its magic, developing flavor and texture.
Shaping and Baking the Knots
Once your dough has risen beautifully, it's time to transform it into the distinct knot shape and bake it to golden perfection.
Punching and Dividing
Gently punch down the risen dough to release the air. Transfer it to a lightly floured surface. You can either roll the entire dough into a large rectangle and cut strips, or divide the dough into 1-ounce pieces for uniform knots. Our recipe yields approximately 16-20 knots depending on size. The key is consistent sizing for even baking.
Tying the Knots
Roll each portion of dough into a thin rope, approximately 6-8 inches long. Tie each rope into a simple overhand knot. Tuck the ends underneath to create a neat appearance. This simple step gives the garlic knots their iconic shape and ensures a delightful chew in every bite.
Second Rise and Baking
Arrange the shaped knots on a parchment-lined baking sheet, leaving about 1 inch between them. Cover loosely and let them rise again for another 30-45 minutes, or until noticeably puffy. Preheat your oven to 400°F (200°C). Bake the knots for 12-15 minutes, or until they are golden brown and cooked through. Baking at this high temperature helps create a slightly crispy exterior while keeping the interior soft.
The Irresistible Garlic Butter Finish
The final, and arguably most important, step in creating perfect garlic knots is the flavorful garlic butter sauce that bathes them.
Preparing the Garlic Butter
While the knots are baking, prepare your garlic butter. Melt ½ cup (113 grams) of unsalted butter in a small saucepan over low heat. Add 4-6 cloves of minced fresh garlic, 2 tablespoons of finely chopped fresh parsley, ½ teaspoon of dried oregano, and a pinch of red pepper flakes (optional, for a kick). Cook gently for about 1-2 minutes, just until the garlic is fragrant but not browned. Be careful not to burn the garlic, as this can make it bitter.
Coating the Knots
Immediately upon removing the hot garlic knots from the oven, transfer them to a large bowl. Pour the warm garlic butter mixture over the knots, tossing gently but thoroughly to ensure each knot is generously coated. The warm knots will absorb the butter and flavors beautifully. Serve them warm and enjoy!
Making homemade garlic knots is a rewarding experience that results in an incredibly satisfying treat. Follow these steps, and you'll be able to create bakery-quality knots that will surely become a favorite in your home. Experiment with adding Parmesan cheese to the butter mixture or a sprinkle of flaky sea salt for an extra touch. Enjoy the process and the delicious outcome!